You can use the Error-checking tool to check for file system errors and bad sectors on your hard disk.
- Open My Computer, and then select the local disk you want to check.
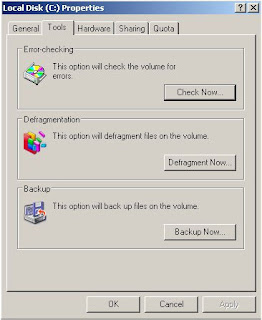
- On the File menu, click Properties.
- On the Tools tab, under Error-checking, click Check Now button.
- It will open the Local Disk or Drive Properties window. It depends on the name of your drive.
- Under Check disk options, There are two check box options: (A)Automatically fix file system errors. (B)Scan for and attempt recovery of bad sectors.
- Select either one or both of the two check box to automatically repair file-system errors found during disk checking and try to locate bad sectors and recovers readable information.
Notes:
All files must be closed for this process to run. If the volume is currently in use, a message box will appear prompting you to indicate whether or not you want to reschedule the disk checking for the next time you restart your system. Then, the next time you restart your system, disk checking will run. Your volume will not be available to perform other tasks while this process is running. If your volume is formatted as NTFS, Windows automatically logs all file transactions, replaces bad clusters, and stores copies of key information for all files on the NTFS volume.
For more information, click (How to Run Disk Error Checking Utility)